Category: Development

  • Shopify B2B Setup: The Complete Guide for Wholesale Businesses

    Shopify B2B Setup: The Complete Guide for Wholesale Businesses

    Wholesale buyers want what retail customers already have: transparent pricing, easy reordering, and the ability to manage their own accounts. The days of faxing purchase orders or waiting for sales reps to return calls? Pretty much over.

    For years, Shopify meant direct-to-consumer brands. That’s changed. Today, Shopify handles B2B just as well as retail—and you can run both from one platform. This guide covers everything you need to know about Shopify B2B setup, from the native features to pricing structures to how it stacks up against Magento and WooCommerce.

    Whether you’re a manufacturer modernizing your wholesale operations, a distributor managing complex pricing tiers, or a DTC brand adding wholesale, this guide will help you decide if Shopify B2B fits your business—and how to actually implement it.

    Understanding Shopify B2B: Native Features vs. Third-Party Apps

    Your first choice: use Shopify’s built-in B2B features or add third-party apps? It depends on your Shopify plan, order volume, and how complex your operations are.

    Native Shopify Plus B2B Features

    Shopify Plus (the enterprise plan) includes the most powerful B2B functionality, all fully integrated. Here’s what you get:

    • Company Profiles: Group multiple users under one company account. Set permissions, payment terms, and track everything in one place.
    • Custom Price Lists: Create different pricing for different customers without duplicating products or building separate stores. Set percentage discounts, volume tiers, or fixed wholesale prices for specific companies.
    • Net Payment Terms: Offer Net 30, Net 60, or Net 90 terms directly in Shopify. The platform handles invoicing, payment tracking, and automated reminders.
    • Optimized B2B Checkout: A specialized checkout for wholesale buyers with PO number fields, tax exemption handling, and bulk ordering.
    • Self-Service Customer Portals: B2B buyers log in to see order history, track shipments, download invoices, and reorder with one click.

    These features are built into Shopify’s core, so you don’t worry about app conflicts, security holes, or features breaking when Shopify updates.

    Third-Party B2B Apps for Standard Shopify Plans

    Not everyone needs Shopify Plus. If you’re on Basic, Shopify, or Advanced, you can add wholesale features with third-party apps:

    • SparkLayer: Full B2B features including custom pricing, quick order forms, and customer catalogs. Starts around $99/month.
    • Wholesale Club: Budget option for basic wholesale—tiered pricing and wholesale-only access. Around $49/month.
    • B2B Handsfree: Focuses on automation with custom pricing, minimum order quantities, and approval workflows.

    Apps work, but there are tradeoffs:

    Upsides:

    • Lower cost than Shopify Plus
    • Pay only for features you need
    • Faster setup for simple wholesale

    Downsides:

    • Can slow down your site
    • App conflicts happen, especially after Shopify updates
    • Less integrated with core Shopify
    • Managing multiple app subscriptions
    • Higher transaction fees than Plus

    The Decision: Plus vs. Apps

    Three factors matter:

    1. Order Volume: Processing over $1 million annually in B2B? The lower transaction fees on Plus (0.15% vs. 0.5-2.0%) can offset half the monthly cost.
    2. Complexity: Need sophisticated pricing rules, approval workflows, or deep ERP connections? Native Plus features scale better than stacking apps.
    3. Growth Plans: Planning rapid expansion or managing DTC and B2B together? Plus saves you a costly migration later.

    Rule of thumb: Under $500K annually in B2B? Start with standard Shopify plus apps. Over $1M? Seriously look at Plus.

    Key Setup Steps and Configuration

    Once you’ve picked your approach, here’s how to configure it.

    Step 1: Setting Up Companies and Locations

    Company profiles are the foundation. Instead of treating each wholesale buyer as an individual customer, you create Company accounts with multiple users at different permission levels.

    How to set up Companies:

    1. Go to Customers > Companies in Shopify admin
    2. Click Add company and enter business name, contact, billing info
    3. Add multiple locations if your buyer has warehouses or stores in different cities
    4. Assign users with specific roles (Admins place orders and manage users; Standard users browse and add to cart)
    5. Set company-specific payment terms, credit limits, shipping preferences

    This mirrors real B2B relationships. A regional distributor might have purchasing managers in three states, all ordering under one account with shared credit terms but different shipping addresses.

    Pro tip: Start with your top 20% of wholesale customers first. High-value accounts give you immediate feedback, and getting them online drives the most ROI.

    Step 2: Configuring Price Lists and Catalogs

    Shopify B2B lets you keep one product catalog while showing different prices to different buyers—no duplicate products or separate stores needed.

    Creating Price Lists:

    1. Go to Products > Price lists
    2. Create a new list with a clear name (“Gold Tier Wholesale” or “Regional Distributor Pricing”)
    3. Choose your pricing method:
      • Percentage discount: Blanket discount (40% off retail) on everything
      • Fixed pricing: Specific wholesale prices per product
      • Volume pricing: Tiered pricing by quantity (10-49 units = $10 each, 50+ = $8 each)
    4. Assign the list to specific companies or segments
    5. Set date ranges for seasonal promotions or temporary agreements

    Example: A coffee roaster sells retail bags at $16 online. Their cafe partners see $11 per bag when logged in. Regional distributors see $9 and can access bulk packaging that retail customers never see.

    No manual quoting, fewer errors, and wholesale buyers can order 24/7 without waiting for sales approval.

    Step 3: Setting Payment Terms and Checkout

    Traditional B2B runs on credit—buyers get goods now, pay invoices in 30-90 days. Shopify B2B handles this natively on Plus, or through apps on standard plans.

    Configuring Net Payment Terms (Shopify Plus):

    1. Go to Settings > Payments > B2B payment terms
    2. Enable terms and set defaults (Net 30, Net 60, Net 90, or custom)
    3. Assign specific terms to companies based on creditworthiness
    4. Set credit limits to cap outstanding balances
    5. Enable automated invoices and payment reminders

    B2B Checkout Optimization:

    B2B checkout should match business buying:

    • PO Number Fields: Let buyers reference internal purchase orders for accounting
    • Tax Exemption Handling: Auto-apply exemptions for buyers with valid certificates
    • Bulk Order Entry: Quick order forms where buyers enter multiple SKUs at once instead of clicking through product pages
    • Saved Carts: Save draft orders for later approval

    Example: A restaurant supply company gives Net 30 to established customers. New customers pay by card. After three on-time payments, they automatically qualify for Net 30—all managed through Shopify workflows.

    Step 4: Customer Portals and Reordering

    B2B buyers order repeatedly. A good customer portal cuts reorder friction and reduces your sales team’s workload.

    Essential Portal Features:

    • Order History: Full past purchase visibility with filtering
    • Invoice Downloads: One-click PDF invoices for accounting
    • Shipment Tracking: Real-time tracking in the dashboard
    • Quick Reorder: One-click to add previous orders to cart—perfect for regular replenishments
    • Saved Lists: Custom product lists for seasonal orders or specific projects

    Shopify Plus has these built in. Standard Shopify needs apps like SparkLayer or Wholesale Club.

    Real impact: A food distributor cut inbound order calls by 60% after adding quick reorder. Customers who called every Monday for the same weekly order now handle it themselves in two minutes.

    Pricing Considerations for Shopify B2B

    The true cost goes beyond monthly fees to transaction costs, apps, and your team’s time.

    Shopify Plus Pricing Path

    Shopify Plus starts at $2,500/month (or 0.25% of monthly sales, whichever is higher). Includes:

    • All native B2B features
    • Reduced transaction fees (typically 0.15% with Shopify Payments)
    • Dedicated account management and priority support
    • Advanced automation (Shopify Flow)
    • Unlimited staff accounts

    When Plus makes sense financially:

    At $100K/month in B2B sales with 1.5% transaction fees on a standard plan, you’re paying $1,500/month in fees. On Plus, that drops to $150—a $1,350 monthly saving that covers half the Plus subscription. Add time savings from automation and the ROI gets clearer.

    Standard Shopify + App Pricing Path

    For smaller wholesale:

    • Shopify Advanced: $399/month (recommended for lower transaction fees and better reports)
    • B2B App (SparkLayer): $99-$299/month depending on features
    • Transaction Fees: 0.5-0.85% per transaction with Shopify Payments

    Total monthly: $500-$700 plus transaction fees

    This works well under $500K annually in B2B, especially if wholesale is secondary to DTC.

    ROI Analysis: The Breakeven Point

    The decision point typically falls at $750K to $1M in annual B2B revenue:

    • Below $750K: Standard plan + apps offer better value
    • $750K – $1M: Either path could work
    • Above $1M: Plus usually delivers better ROI

    Don’t forget hidden costs: staff time processing orders manually, pricing errors, missed opportunities when buyers abandon complex quote requests, and the competitive edge of modern self-service B2B.

    Common Use Cases and Industries

    Shopify B2B serves different industries with unique needs.

    Unified Commerce: DTC + B2B from One Platform

    Many brands operate hybrid models—selling to consumers online while supplying retail partners or distributors. Shopify B2B excels here by keeping one inventory pool while separating pricing and access.

    Example: An organic skincare brand sells $50 face creams on their consumer site. Spa and salon partners see the same products at $30 (40% wholesale) when logged into B2B accounts. Inventory syncs real-time across both channels, preventing overselling and simplifying fulfillment.

    Manufacturing & Distribution

    Manufacturers and distributors handle complex pricing, minimum order quantities (MOQs), and varied shipping.

    Shopify B2B solutions:

    • Set product-level or order-level MOQs (industrial chemicals only in 25kg increments)
    • Configure negotiated pricing per distributor
    • Support drop-shipping where orders route directly to manufacturers
    • Handle bulk packaging variants (retail 6-packs vs. wholesale cases of 48)

    Example: An industrial supply company manages 200+ wholesale accounts with custom pricing. Sales reps used to create quotes in Excel manually. Now buyers log in, see their prices automatically, and order 24/7. Sales focuses on relationships instead of order entry.

    Food & Beverage and Apparel

    These industries face seasonal swings, pre-order cycles, and compliance requirements.

    Key features:

    • Pre-order management for seasonal items (holiday collections, harvest pre-buys)
    • Date-specific pricing (early bird for pre-orders)
    • Compliance document storage (ServSafe certificates, business licenses)
    • Minimum order values for shipment profitability

    Example: A craft brewery uses Shopify B2B for wholesale restaurant and bar accounts. Buyers pre-order limited seasonal releases at a discount, schedule recurring deliveries of year-round beers, and access real-time inventory for last-minute event orders.

    Shopify B2B vs. Alternatives: Magento & WooCommerce

    If you’re evaluating Shopify B2B, you’ve probably looked at Magento (Adobe Commerce) and WooCommerce. Here’s the honest comparison.

    Shopify B2B: Best for Ease of Use and Unified Commerce

    Strengths:

    • Turnkey SaaS with minimal IT overhead
    • DTC and B2B work together smoothly
    • Strong app ecosystem
    • Predictable monthly costs, no surprise hosting bills
    • Excellent performance and 99.99% uptime
    • Regular updates and security patches handled by Shopify

    Limitations:

    • Less flexibility for extremely complex custom workflows
    • Transaction fees (minimized on Plus)
    • Platform lock-in (harder to migrate than open-source)

    Best for: Small to mid-sized businesses ($500K – $50M revenue) wanting reliable, scalable B2B without a dedicated IT team. Ideal for unified DTC/B2B.

    Magento (Adobe Commerce): The Enterprise Heavyweight

    Strengths:

    • Unmatched flexibility for complex B2B logic and customization
    • Deep native B2B features for large enterprises
    • Strong ERP and PIM integrations
    • No transaction fees
    • Complete control over infrastructure and data

    Limitations:

    • High total cost of ownership (development, hosting, maintenance)
    • Needs dedicated technical team or expensive agency partnership
    • Slower time-to-market for new features
    • Performance challenges at scale without proper infrastructure investment
    • Security and updates require active management

    Typical costs: $50K – $500K+ for initial implementation, plus $5K – $50K/month ongoing for hosting, maintenance, and support.

    Best for: Large enterprises ($50M+) with complex multi-brand catalogs, sophisticated pricing rules, and existing IT infrastructure. Companies needing deep custom integrations with legacy ERP systems.

    WooCommerce B2B: Budget Option with Hidden Costs

    Strengths:

    • Low upfront cost (free core)
    • Familiar WordPress environment
    • Large plugin ecosystem

    Limitations:

    • Poor scalability for serious B2B
    • Plugin conflicts cause frequent breakage
    • Security vulnerabilities need constant vigilance
    • Performance degrades fast with large catalogs
    • DIY hosting means uptime and speed are on you
    • “Free” gets expensive once you add premium plugins, hosting, development, and maintenance

    Best for: Very small wholesale (under $100K annually) with simple needs and technical resources to manage WordPress. Not recommended for growing B2B.

    The Bottom Line

    For most small-to-mid-sized businesses, Shopify B2B offers the best balance of functionality, reliability, and total cost. Magento is still the choice for enterprise-scale complexity, but only when you have both the revenue and technical resources. WooCommerce is increasingly hard to justify for serious B2B due to maintenance overhead and scaling limits.

    Best Practices and Pitfalls to Avoid

    Learning from common mistakes saves months of frustration and lost revenue.

    Best Practices

    1. Maintain a Single Source of Truth for Inventory

    Don’t create separate “wholesale-only” stores or duplicate product catalogs. Use Shopify’s company-based access and pricing to show different products or prices to different buyers while keeping one inventory pool. This prevents overselling, reduces data entry errors, and simplifies operations.

    2. Train Your Sales Team on Shopify Backend

    Your sales team should know how to create draft orders, apply custom discounts, and manage company accounts in Shopify. This lets them handle exceptions (rush orders, special pricing) without IT while keeping accurate data in your system.

    3. Start Simple with Pricing Tiers

    Don’t try replicating 15 years of complex legacy pricing on day one. Start with 2-3 clear tiers (Standard Wholesale, Volume Buyer, Distributor) and add complexity only as needed. Simpler structures are easier to explain to buyers, easier to manage, and reduce errors.

    4. Automate Onboarding Communications

    Use Shopify Flow (on Plus) or apps like Klaviyo to trigger welcome emails when new B2B accounts are created. Include login instructions, catalog highlights, ordering tutorials, and sales rep contact info. Well-onboarded customers place larger first orders and stick around longer.

    5. Monitor Key B2B Metrics

    Track metrics specific to B2B success:

    • Average order value (B2B should be 5-10x higher than DTC)
    • Reorder rate and frequency
    • Days between orders
    • Self-service vs. sales-assisted order ratio
    • Payment terms adherence

    Pitfalls to Avoid

    1. Choosing Poorly-Coded Apps on Standard Shopify

    Not all B2B apps are equal. Cheap apps load excessive JavaScript, slow your site, and create poor experiences. Before committing, test app performance with Google PageSpeed Insights, read recent reviews for compatibility issues, and choose established apps with responsive support.

    2. Neglecting Mobile Experience

    B2B buyers increasingly order on mobile—during sales calls, walking warehouse floors, traveling between job sites. Test your B2B checkout and customer portal on phones and tablets. If the experience is clunky, you’ll lose orders.

    3. Over-Restricting Catalog Access

    Some businesses hide their B2B catalog entirely, requiring login credentials before buyers see anything. This creates unnecessary friction. Consider showing your wholesale catalog publicly with “Login to see pricing” messages. Prospective buyers can evaluate your offerings before creating an account.

    4. Ignoring Integration Opportunities

    Shopify B2B works better connected to your broader tech stack:

    • Sync with accounting software (QuickBooks, NetSuite) to eliminate double-entry
    • Connect to your CRM (HubSpot, Salesforce) to track customer journey
    • Integrate with EDI networks if selling to large retailers
    • Link to inventory management for real-time stock visibility

    5. Underestimating Change Management

    Technology is half the battle. Your team needs training, your buyers need onboarding, and your processes need updating. Allocate time for internal training, create buyer education materials, and plan a phased rollout instead of switching overnight.

    Conclusion

    The wholesale landscape has changed. Buyers expect modern, self-service experiences with transparent pricing, easy reordering, and 24/7 access. Businesses still using manual processes, email-based ordering, and scattered systems will lose ground to more efficient competitors.

    Shopify B2B is a solid solution for small-to-mid-sized businesses ready to modernize wholesale. Whether you choose native Shopify Plus features for high-volume operations or use third-party apps on standard plans for lighter wholesale, the platform grows with your business.

    The strategic advantages: unified inventory across DTC and B2B, reduced overhead through automation, better buyer experiences that drive larger and more frequent orders, and a scalable foundation that supports growth without costly platform migrations.

    Ready to transform your B2B operations?

    If you’re considering Shopify B2B, partnering with an experienced Shopify agency can speed up implementation and help you avoid costly mistakes. A qualified partner will assess your specific requirements, design pricing structures that match your existing relationships, handle technical configuration, and train your team for long-term success.

    Whether you’re migrating from a legacy B2B platform like Magento, adding wholesale to an existing DTC Shopify store, or launching B2B for the first time, now’s a good time to modernize. Your buyers are ready. Is your business?


    Looking for expert guidance on your Shopify B2B implementation? Contact a Shopify Plus Partner agency to discuss your specific requirements and get a tailored implementation roadmap.


  • Unlocking Success: Best Practices for Creating Accessible Websites that Boost User Experience and SEO

    Unlocking Success: Best Practices for Creating Accessible Websites that Boost User Experience and SEO

    Unlocking Success: Best Practices for Creating Accessible Websites that Boost User Experience and SEO

    Most websites miss a huge opportunity by ignoring accessibility. When your site isn’t easy for everyone to use, you’re not just losing visitors—you’re losing search traffic too. In this post, you’ll learn straightforward best practices for website accessibility that improve user experience and boost SEO, helping your business stand out online with support from Eclipse Digital. Learn more about the connection between SEO and accessibility here.

    Importance of Website Accessibility

    Website accessibility is a game-changer, not just for inclusivity but also for boosting your site’s effectiveness. It can make a world of difference in how users interact with your content and how search engines rank it.

    Boosting User Experience

    A more accessible website means happier visitors. When users can navigate easily, find what they need, and interact without hassle, they are more likely to stay. Imagine a visitor with visual impairments using a screen reader. If your site has clear headings and alternative text for images, they can navigate seamlessly. By making these adjustments, you create a welcoming space for everyone, increasing the likelihood of repeat visits and positive word-of-mouth.

    An example of how accessibility can enhance user experience is through simplified site navigation. Users appreciate when they can easily find your contact page or product listings. This simplification can reduce bounce rates and increase the time spent on your site—key factors in user satisfaction. The benefits of these adjustments are not just felt by users but also by your business’s bottom line.

    Enhancing Search Engine Optimization

    Accessibility is not just a user concern; it’s an SEO opportunity. Search engines favor sites that cater to all users, awarding them with better rankings. When your website is accessible, you’re ticking boxes for both users and search engines. This dual advantage means higher visibility in search results and more organic traffic.

    Think about how search engines work. They read your site much like a screen reader does. So, if your site is optimized for accessibility, it’s likely optimized for search engines too. This includes having descriptive alt text for images, which not only aids users but also helps your site appear in image searches. You can delve deeper into these best practices at Siteimprove.

    Best Practices for Accessible Web Design

    Incorporating accessibility into your web design is both straightforward and rewarding. It enhances the user experience, boosts your SEO, and positions your brand as inclusive and forward-thinking.

    Simplifying Navigation

    Making navigation intuitive is crucial for usability. Visitors should never feel lost on your site. Start by streamlining your menu options. Limit them to the essentials, and use clear, descriptive labels. This not only helps users find what they’re looking for but also improves your site’s search engine ranking.

    Consider using a consistent layout and placing the most important information upfront. For example, your contact information should be easy to find on every page. Using breadcrumb trails can also aid users in understanding their location on your site. A study found that simplifying navigation can increase conversion rates by up to 30%. A user-friendly navigation structure is a win-win for both visitors and search engines.

    Ensuring Text Readability

    Text readability is another cornerstone of accessibility. If users struggle to read your content, they will likely leave your site. Start by choosing a font that is easy to read, like Arial or Verdana, and maintain a font size of at least 16px. Use high-contrast color schemes to ensure text stands out against the background.

    Breaking up text into shorter paragraphs and using bullet points for lists makes your content easier to digest. Remember, a clean and clear page is more inviting. You can find more actionable tips on enhancing readability at UNC’s Web Guide.

    Partnering with Eclipse Digital

    Navigating the path to accessibility can be challenging, but you don’t have to do it alone. Eclipse Digital offers expertise and tailored solutions to make your website shine.

    Tailored Strategies for Your Business

    Every business is unique, which is why Eclipse Digital takes a customized approach. We work with you to understand your goals and challenges, creating strategies that align with your vision. Whether it’s redesigning your site for better accessibility or optimizing it for search engines, our solutions are crafted to meet your specific needs.

    Our agile service model allows us to quickly adapt to changes, ensuring your website remains current and competitive. This flexibility is part of what sets us apart from larger agencies. With Eclipse Digital, you have a partner who is as invested in your success as you are.

    Success Stories and Client Testimonials

    Our track record speaks for itself. From small businesses to larger enterprises, we’ve helped a range of clients improve their online presence. One satisfied client noted, “Working with Eclipse Digital was a game-changer for us. Our website is now accessible and ranks better in search results.”

    Another client shared how their website traffic increased by 50% after implementing our accessibility recommendations. These success stories are a testament to the effectiveness of our methods and the dedication of our team. Learn more about how accessibility impacts SEO and usability from Lyssna.

    🌐✨

    By investing in website accessibility, you’re not just improving user experience and SEO—you’re opening doors to new opportunities and ensuring your business is inclusive and forward-thinking. Eclipse Digital is here to help you every step of the way, turning your website into a tool for growth and success.

  • Why Website Speed is Essential for Google Rankings and User Retention

    Why Website Speed is Essential for Google Rankings and User Retention

    Why Website Speed is Essential for Google Rankings and User Retention

    Your website could be losing visitors before it even fully loads. Slow page load time doesn’t just frustrate users—it drags down your Google rankings and hurts your user retention. In this post, you’ll see why website speed is a crucial part of SEO and how improving it can strengthen your online presence and keep customers coming back. For more insights, check out this article.

    Importance of Website Speed

    Your website’s speed plays a vital role in keeping users engaged and boosting your site’s performance. Let’s explore how this affects your Google rankings and user retention.

    Impact on Google Rankings

    Google uses page speed as a ranking factor, which means a slow website can push you down in search results. A one-second delay can reduce page views by 11%. To improve your Google rankings, focus on speeding things up. The faster your site, the more likely you’ll climb the search engine ladder. Check out this Reddit discussion for more insights.

    Influence on User Retention

    Speed not only affects rankings but also user retention. A slow site frustrates visitors, causing them to leave. If your site loads quickly, users are more likely to stick around and explore. This results in higher retention rates and better user satisfaction. In fact, a 53% chance exists that users will leave if a mobile site takes longer than three seconds to load. Learn more about the connection between speed and retention in this LinkedIn article.

    Enhancing User Experience

    A fast website ensures a smooth browsing experience. Let’s look at how reducing page load time and boosting your online presence can make all the difference.

    Reducing Page Load Time

    Focusing on reducing page load time enhances user satisfaction. Simple tweaks, like optimizing images and using a content delivery network (CDN), can drastically cut down load times. As a result, your visitors will have a smoother experience, leading to increased engagement. Remember, every second counts in keeping users happy and on your site.

    Boosting Online Presence

    A speedy site doesn’t just improve user experience; it boosts your online presence. When your site ranks higher and retains more users, your brand becomes more visible and trustworthy. This increased visibility can lead to more conversions and business growth. Discover more about why speed matters for local search in this article.

    Practical Solutions for Businesses

    Businesses can benefit from practical solutions to enhance website speed. Let’s dive into SEO services and a case study showcasing increased traffic and satisfaction.

    SEO Services for Speed

    Leveraging SEO services can enhance your website speed and improve your rankings. These services often include technical audits, image optimization, and caching solutions to ensure your site is as fast as possible. By focusing on speed, you can improve your search engine performance and user engagement.

    Case Study: Increased Traffic and Satisfaction 🚀

    Consider a business that optimized its website speed, resulting in a 30% increase in traffic and improved user satisfaction. By focusing on faster load times, they saw more visitors and higher conversion rates. This example highlights the powerful impact of prioritizing speed. For more information, check out this article.

    By understanding the importance of website speed, you can take steps to improve your site’s performance, boosting your Google rankings and user retention. Making these changes will enhance your online presence and support your business growth.

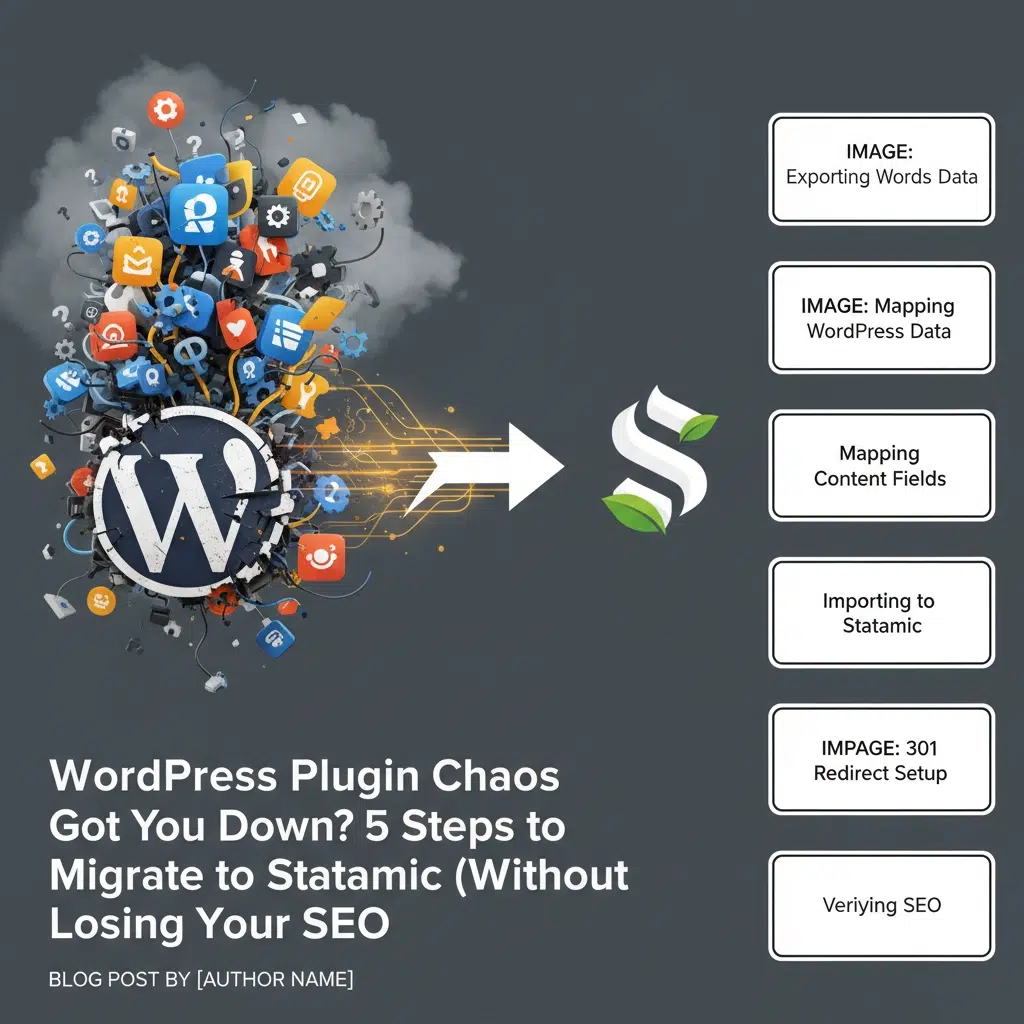
  • WordPress Plugin Chaos Got You Down? 5 Steps to Migrate to Statamic (Without Losing Your SEO)

    WordPress Plugin Chaos Got You Down? 5 Steps to Migrate to Statamic (Without Losing Your SEO)

    Your WordPress site is drowning in plugins. Security plugins conflict with performance plugins. SEO plugins break e-commerce plugins. Cache plugins interfere with form plugins. Sound familiar? You’re not alone, and you don’t have to live with this chaos anymore.

    WordPress plugin dependency has reached a breaking point in 2025. The average WordPress site now runs 25+ plugins, creating a maintenance nightmare that costs businesses thousands in developer hours and lost revenue from site crashes. Meanwhile, Statamic offers a clean, plugin-light alternative that delivers the same functionality without the complexity.

    But here’s the real concern: How do you migrate without destroying years of SEO work?

    The answer lies in a systematic approach that preserves your search rankings while eliminating plugin hell. Here are the exact five steps that Minnesota businesses are using to cut their website maintenance costs by 60% through strategic Statamic migrations.

    Step 1: Audit Your Plugin Ecosystem (The Reality Check)

    Stop adding bandaids to a broken system. Before you can escape WordPress plugin chaos, you need to understand exactly what you’re dealing with.

    Create a comprehensive inventory of every active plugin on your WordPress site. Document what each plugin does, when it was last updated, and whether it conflicts with others. The results will shock you.

    Most WordPress sites we audit at Eclipse Digital contain:

    • 5-8 plugins that duplicate functionality
    • 3-4 abandoned plugins (no updates in 12+ months)
    • 2-3 plugins causing active conflicts
    • 10+ plugins that could be replaced by native Statamic features

    Pay special attention to your SEO-critical plugins: redirect managers, meta tag generators, XML sitemap creators, and structured data plugins. These are your non-negotiables during migration, their functionality must be perfectly replicated in Statamic.

    Pro tip: Screenshot your current plugin dashboard and WordPress admin menus. You’ll reference these later to ensure no functionality gets lost in translation.

    Step 2: Install the WordPress-to-Statamic Bridge

    The migration bridge is your lifeline. Install the WordPress to Statamic Exporter plugin while your WordPress site is still live. This plugin creates a clean data export that Statamic can understand without mangling your content structure.

    Here’s what the exporter handles automatically:

    • Posts and pages with proper formatting
    • Custom post types and taxonomies
    • Featured images and media attachments
    • Author information and publication dates
    • Basic metadata and custom fields

    For sites using Gutenberg blocks (most WordPress sites in 2025), you’ll also need the wp-rest-blocks plugin. This exposes your block data through the REST API, allowing Statamic to recreate your content structure using Bard fields instead of flattening everything into basic HTML.

    Critical warning: Don’t skip the backup step. Export your entire WordPress database and file system before installing any migration plugins. Murphy’s Law applies double to website migrations.

    Step 3: Map WordPress Functionality to Statamic Features

    This is where the magic happens. Statamic eliminates 70% of typical WordPress plugins by building functionality directly into the core system.

    Here’s the translation guide:

    SEO plugins → Native Statamic SEO

    • Yoast/RankMath becomes built-in meta tags and Open Graph support
    • XML sitemaps generate automatically
    • Structured data configures through blueprints

    Form plugins → Native Forms

    • Contact Form 7 becomes Statamic Forms
    • Form validation and spam protection included
    • Email notifications configure without plugins

    E-commerce plugins → Statamic Commerce

    • WooCommerce functionality migrates to native commerce features
    • No third-party plugin dependencies
    • Integrated inventory and payment processing

    Security plugins → Server-level security

    • Most WordPress security plugins become unnecessary
    • Statamic’s flat-file architecture eliminates SQL injection risks
    • Static caching provides natural DDoS protection

    Performance plugins → Native performance

    • Caching plugins become redundant with Statamic’s static generation
    • Image optimization integrates natively
    • CDN integration configures without plugins

    Step 4: Execute the Content Migration (Without Breaking SEO)

    Your SEO rankings are precious cargo. Handle them with surgical precision during the migration process.

    URL structure preservation is non-negotiable. Map every WordPress URL to its Statamic equivalent:

    • Blog posts: /blog/post-name/ → /blog/post-name/
    • Pages: /page-name/ → /page-name/
    • Custom post types: /portfolio/project-name/ → /portfolio/project-name/

    Redirect management requires special attention. WordPress sites often accumulate hundreds of redirects across multiple plugins and .htaccess files. Document every redirect that still receives traffic or has SEO value. Eliminate redirect chains and outdated entries, this migration is your chance to clean house.

    Import your content using Statamic’s CLI tools:

    1. Run the WordPress exporter to generate JSON files
    2. Import content using php please import:wordpress
    3. Verify content structure in Statamic’s control panel
    4. Test all URLs in a staging environment

    Meta data preservation is critical. Ensure every page maintains its:

    • Page titles and meta descriptions
    • Open Graph and Twitter Card tags
    • Structured data markup
    • Canonical URLs
    • Alt tags for images

    Step 5: Launch and Monitor (The SEO Safety Net)

    Going live is just the beginning. Your post-migration monitoring determines whether you keep your search rankings or watch them disappear.

    Pre-launch checklist:

    • All URLs resolve correctly (no 404 errors)
    • Redirects function properly (use tools like Screaming Frog)
    • XML sitemap generates automatically
    • Page speed improves (it should: Statamic is faster)
    • Contact forms submit successfully
    • Analytics and tracking codes transfer correctly

    Post-launch monitoring (first 30 days):

    • Monitor Google Search Console for crawl errors daily
    • Track organic traffic and ranking changes weekly
    • Test site functionality across devices and browsers
    • Update DNS settings for optimal performance

    Pro tip: Submit your updated sitemap to Google Search Console immediately after launch. This signals search engines to re-crawl your site with the new structure.

    The Hidden Benefits You’ll Discover

    Beyond eliminating plugin chaos, Statamic migrations deliver unexpected advantages:

    Development velocity increases 300%. No more compatibility testing between 25 different plugins. Changes deploy faster without plugin conflicts.

    Security incidents drop to near-zero. Flat-file architecture eliminates the database vulnerabilities that plague WordPress sites.

    Hosting costs decrease significantly. Static site generation reduces server resource requirements. Many clients save $200+ monthly on hosting.

    Update anxiety disappears. No more plugin update notifications causing panic about site crashes.

    image_4

    Common Migration Pitfalls (And How to Avoid Them)

    Don’t let these mistakes destroy your SEO:

    Pitfall #1: Changing URL structure during migration
    Solution: Maintain identical URL patterns, even if Statamic’s defaults differ

    Pitfall #2: Forgetting about WordPress widgets and sidebars
    Solution: Recreate sidebar content using Statamic’s partial templates

    Pitfall #3: Overlooking WordPress shortcodes in content
    Solution: Use find-and-replace to convert shortcodes to proper HTML/Markdown

    Pitfall #4: Ignoring WordPress comments and user accounts
    Solution: Export comments separately or implement alternative engagement methods

    Is Statamic Migration Right for Your Business?

    Three scenarios where Statamic migration makes perfect sense:

    1. Plugin fatigue is killing productivity. If you spend more time managing plugins than creating content, migration pays for itself immediately.
    2. Security incidents are increasing. WordPress vulnerabilities typically stem from plugin security holes. Statamic eliminates most attack vectors.
    3. Site performance directly impacts revenue. E-commerce and service businesses benefit enormously from Statamic’s speed advantages.

    Migration isn’t right if: Your WordPress site relies heavily on specific plugins with no Statamic equivalent, or your content team is deeply invested in WordPress workflows.

    Your Plugin-Free Future Starts Now

    WordPress plugin chaos doesn’t have to be your reality. Statamic offers a cleaner, faster, more secure alternative that preserves your SEO investments while eliminating maintenance headaches.

    The businesses making this transition now are positioning themselves for the next decade of web performance standards. Page speed, security, and maintainability aren’t optional anymore: they’re competitive advantages.

    Ready to escape WordPress plugin hell without sacrificing your search rankings? Eclipse Digital specializes in SEO-safe WordPress to Statamic migrations for Minnesota businesses. Our systematic approach has helped dozens of companies reduce maintenance costs while improving site performance.

    Contact Eclipse Digital today for a free migration assessment. Let’s discuss how Statamic can solve your WordPress plugin chaos while protecting the SEO value you’ve worked years to build.

  • Boost Your Elementor Editing Speed: Increasing WordPress Memory Limit Made Easy

    Boost Your Elementor Editing Speed: Increasing WordPress Memory Limit Made Easy

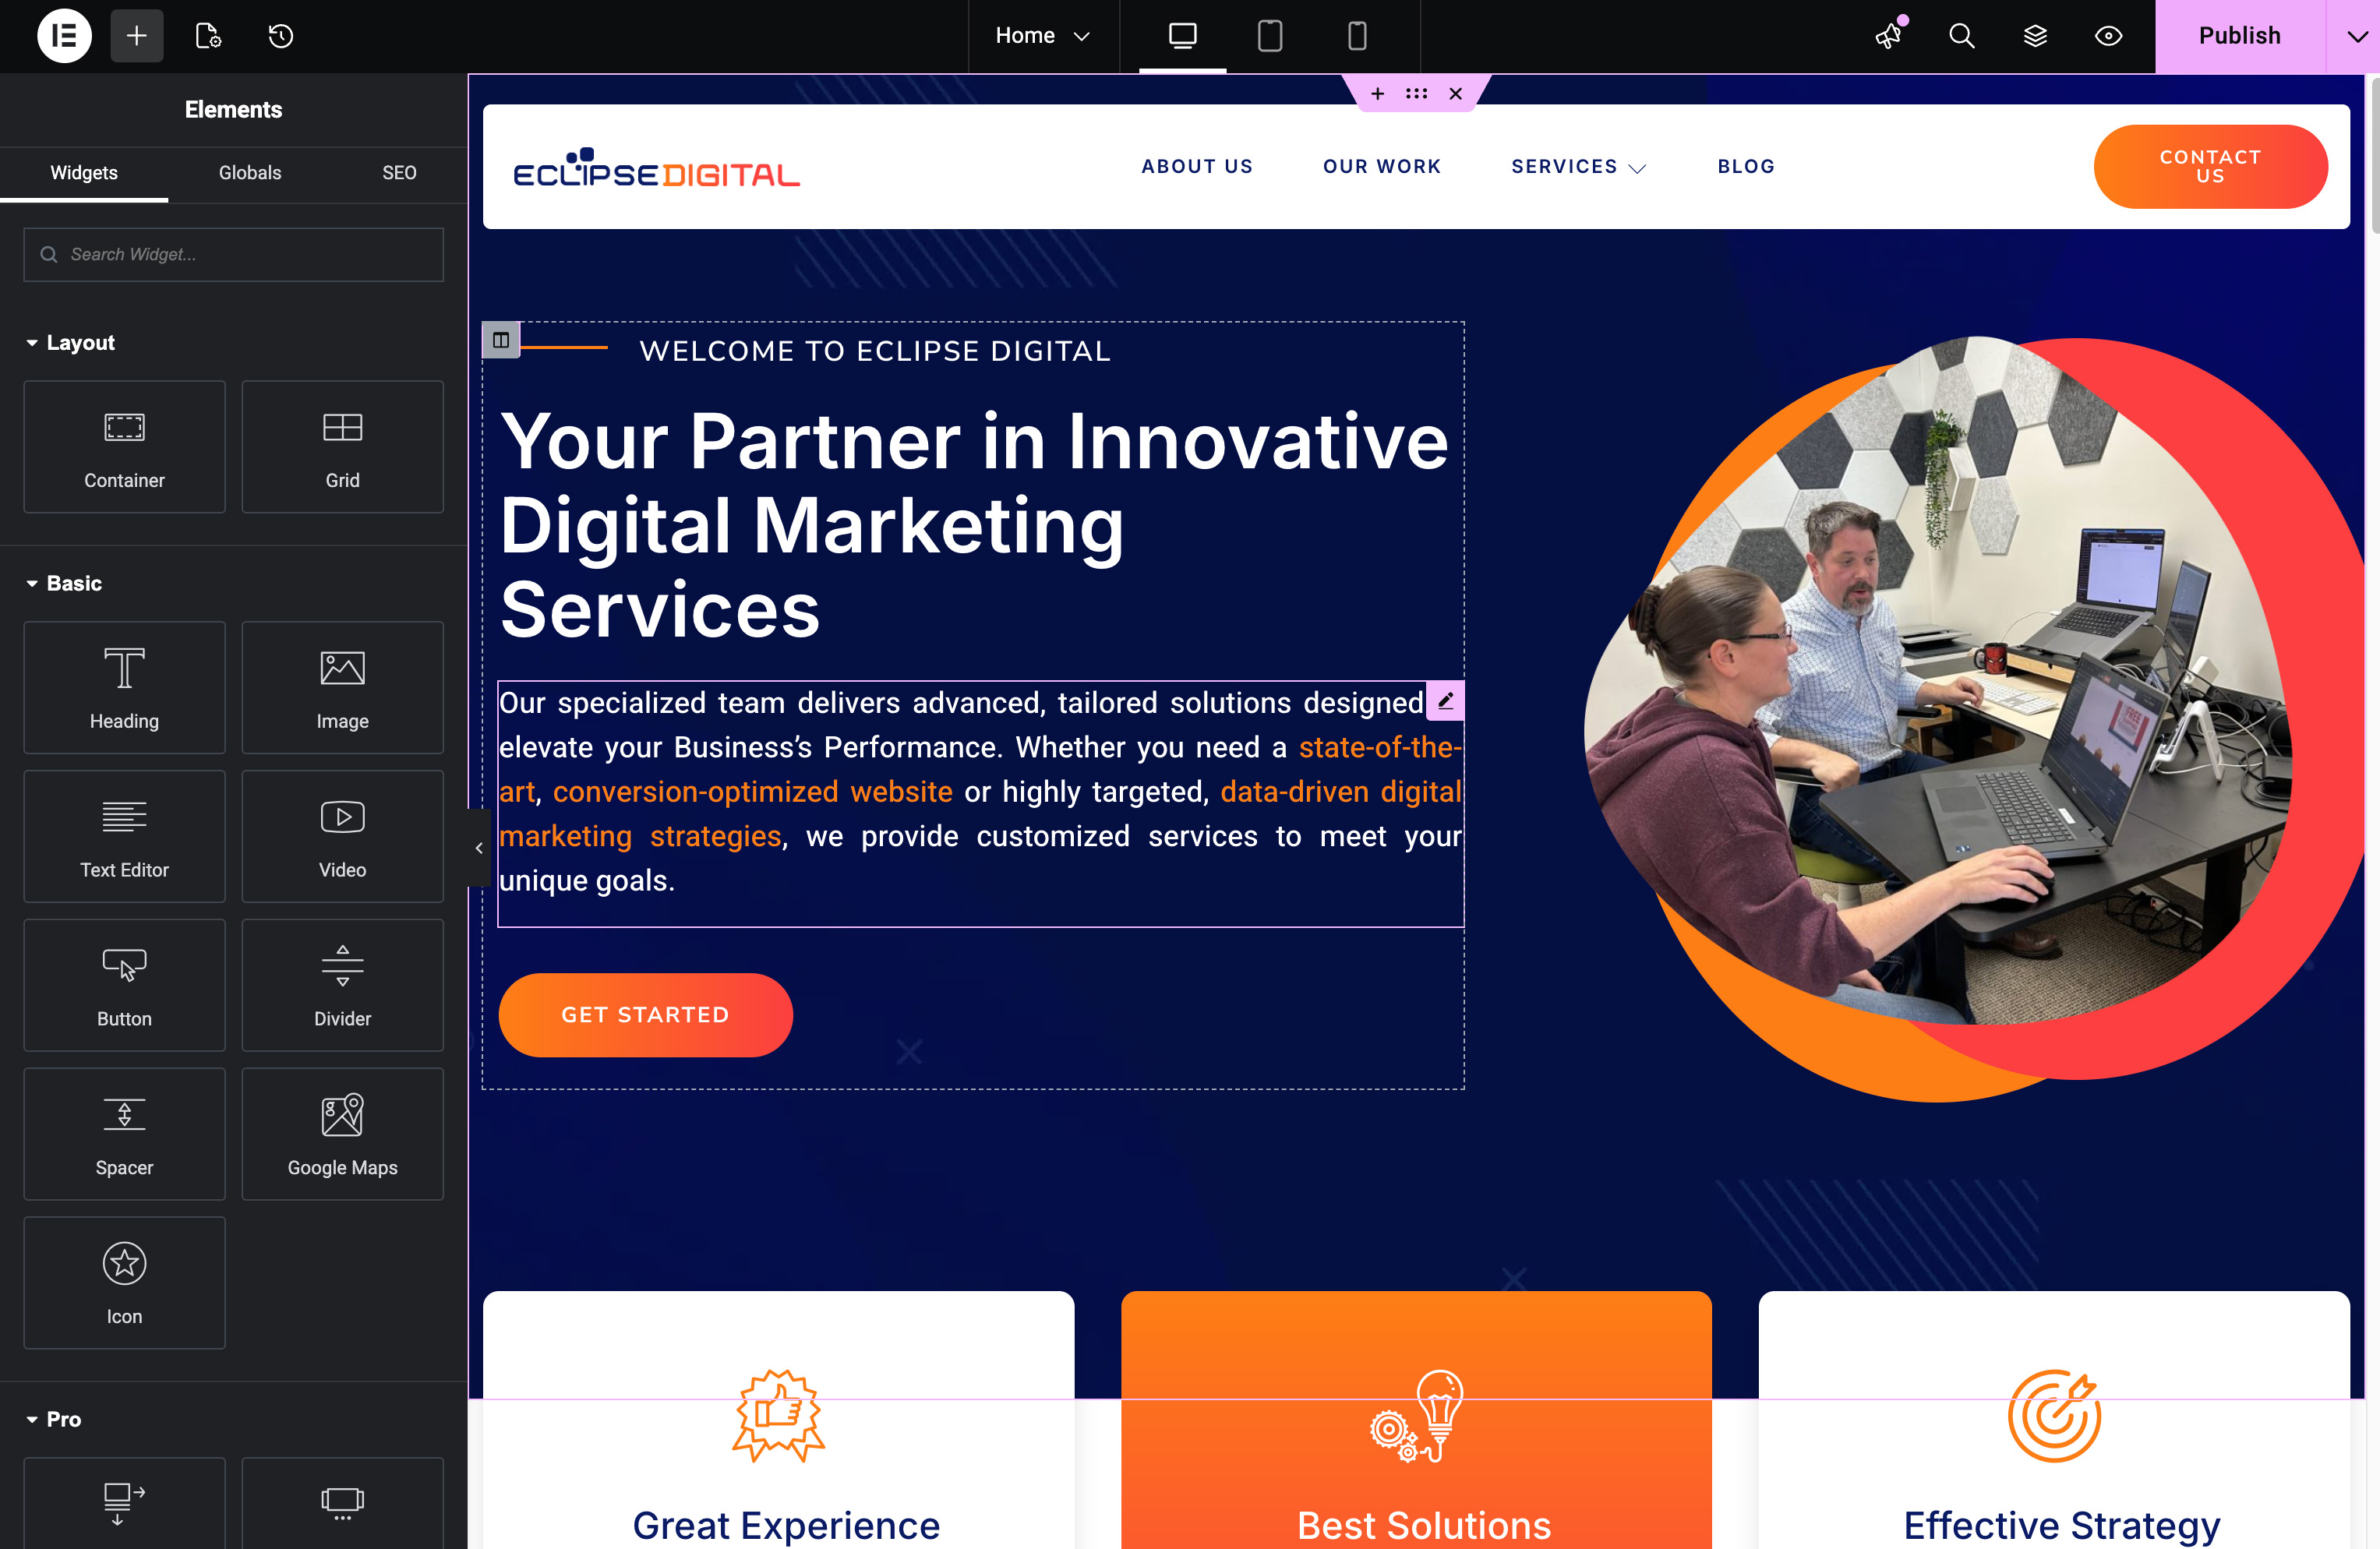
    Elementor dragging its feet while you try to design your site? Slow editor speed often ties back to one hidden culprit: your WordPress memory limit. When memory runs low, every click feels like a wait. In this post, you’ll learn how to increase memory limit settings to boost Elementor speed and improve your WordPress performance—so editing feels smooth and your website optimization efforts pay off. Check out this guide on how to increase WordPress memory limit.

    Understanding WordPress Memory Limit

    WordPress memory is like your site’s fuel—it powers processes and handles tasks. Without enough, your site might stall, especially when using plugins like Elementor.

    Importance of Memory Limit

    Think of memory limit as your website’s capacity to handle tasks simultaneously. If your WordPress site has a low memory limit, it can struggle to manage multiple operations, especially with design-heavy tools like Elementor. Increasing this limit ensures that your site can handle more processes without compromising speed or functionality. This is crucial for maintaining a smooth user experience. Many WordPress users have found that a memory limit increase significantly enhances site performance, as highlighted in this Reddit discussion.

    Impact on Elementor Speed

    Elementor is a powerful design tool, but it demands resources. A low memory limit can cause slowdowns, making edits sluggish and frustrating. By boosting your WordPress memory, you empower Elementor to run more efficiently, allowing you to design with ease. This not only speeds up the editing process but also ensures that your design changes are reflected promptly on your site. For more insights, explore this Essential Addons guide.

    Steps to Increase Memory Limit

    Now, let’s dive into the practical steps you can take to boost your WordPress memory limit, ensuring a faster Elementor experience.

    Accessing wp-config.php File

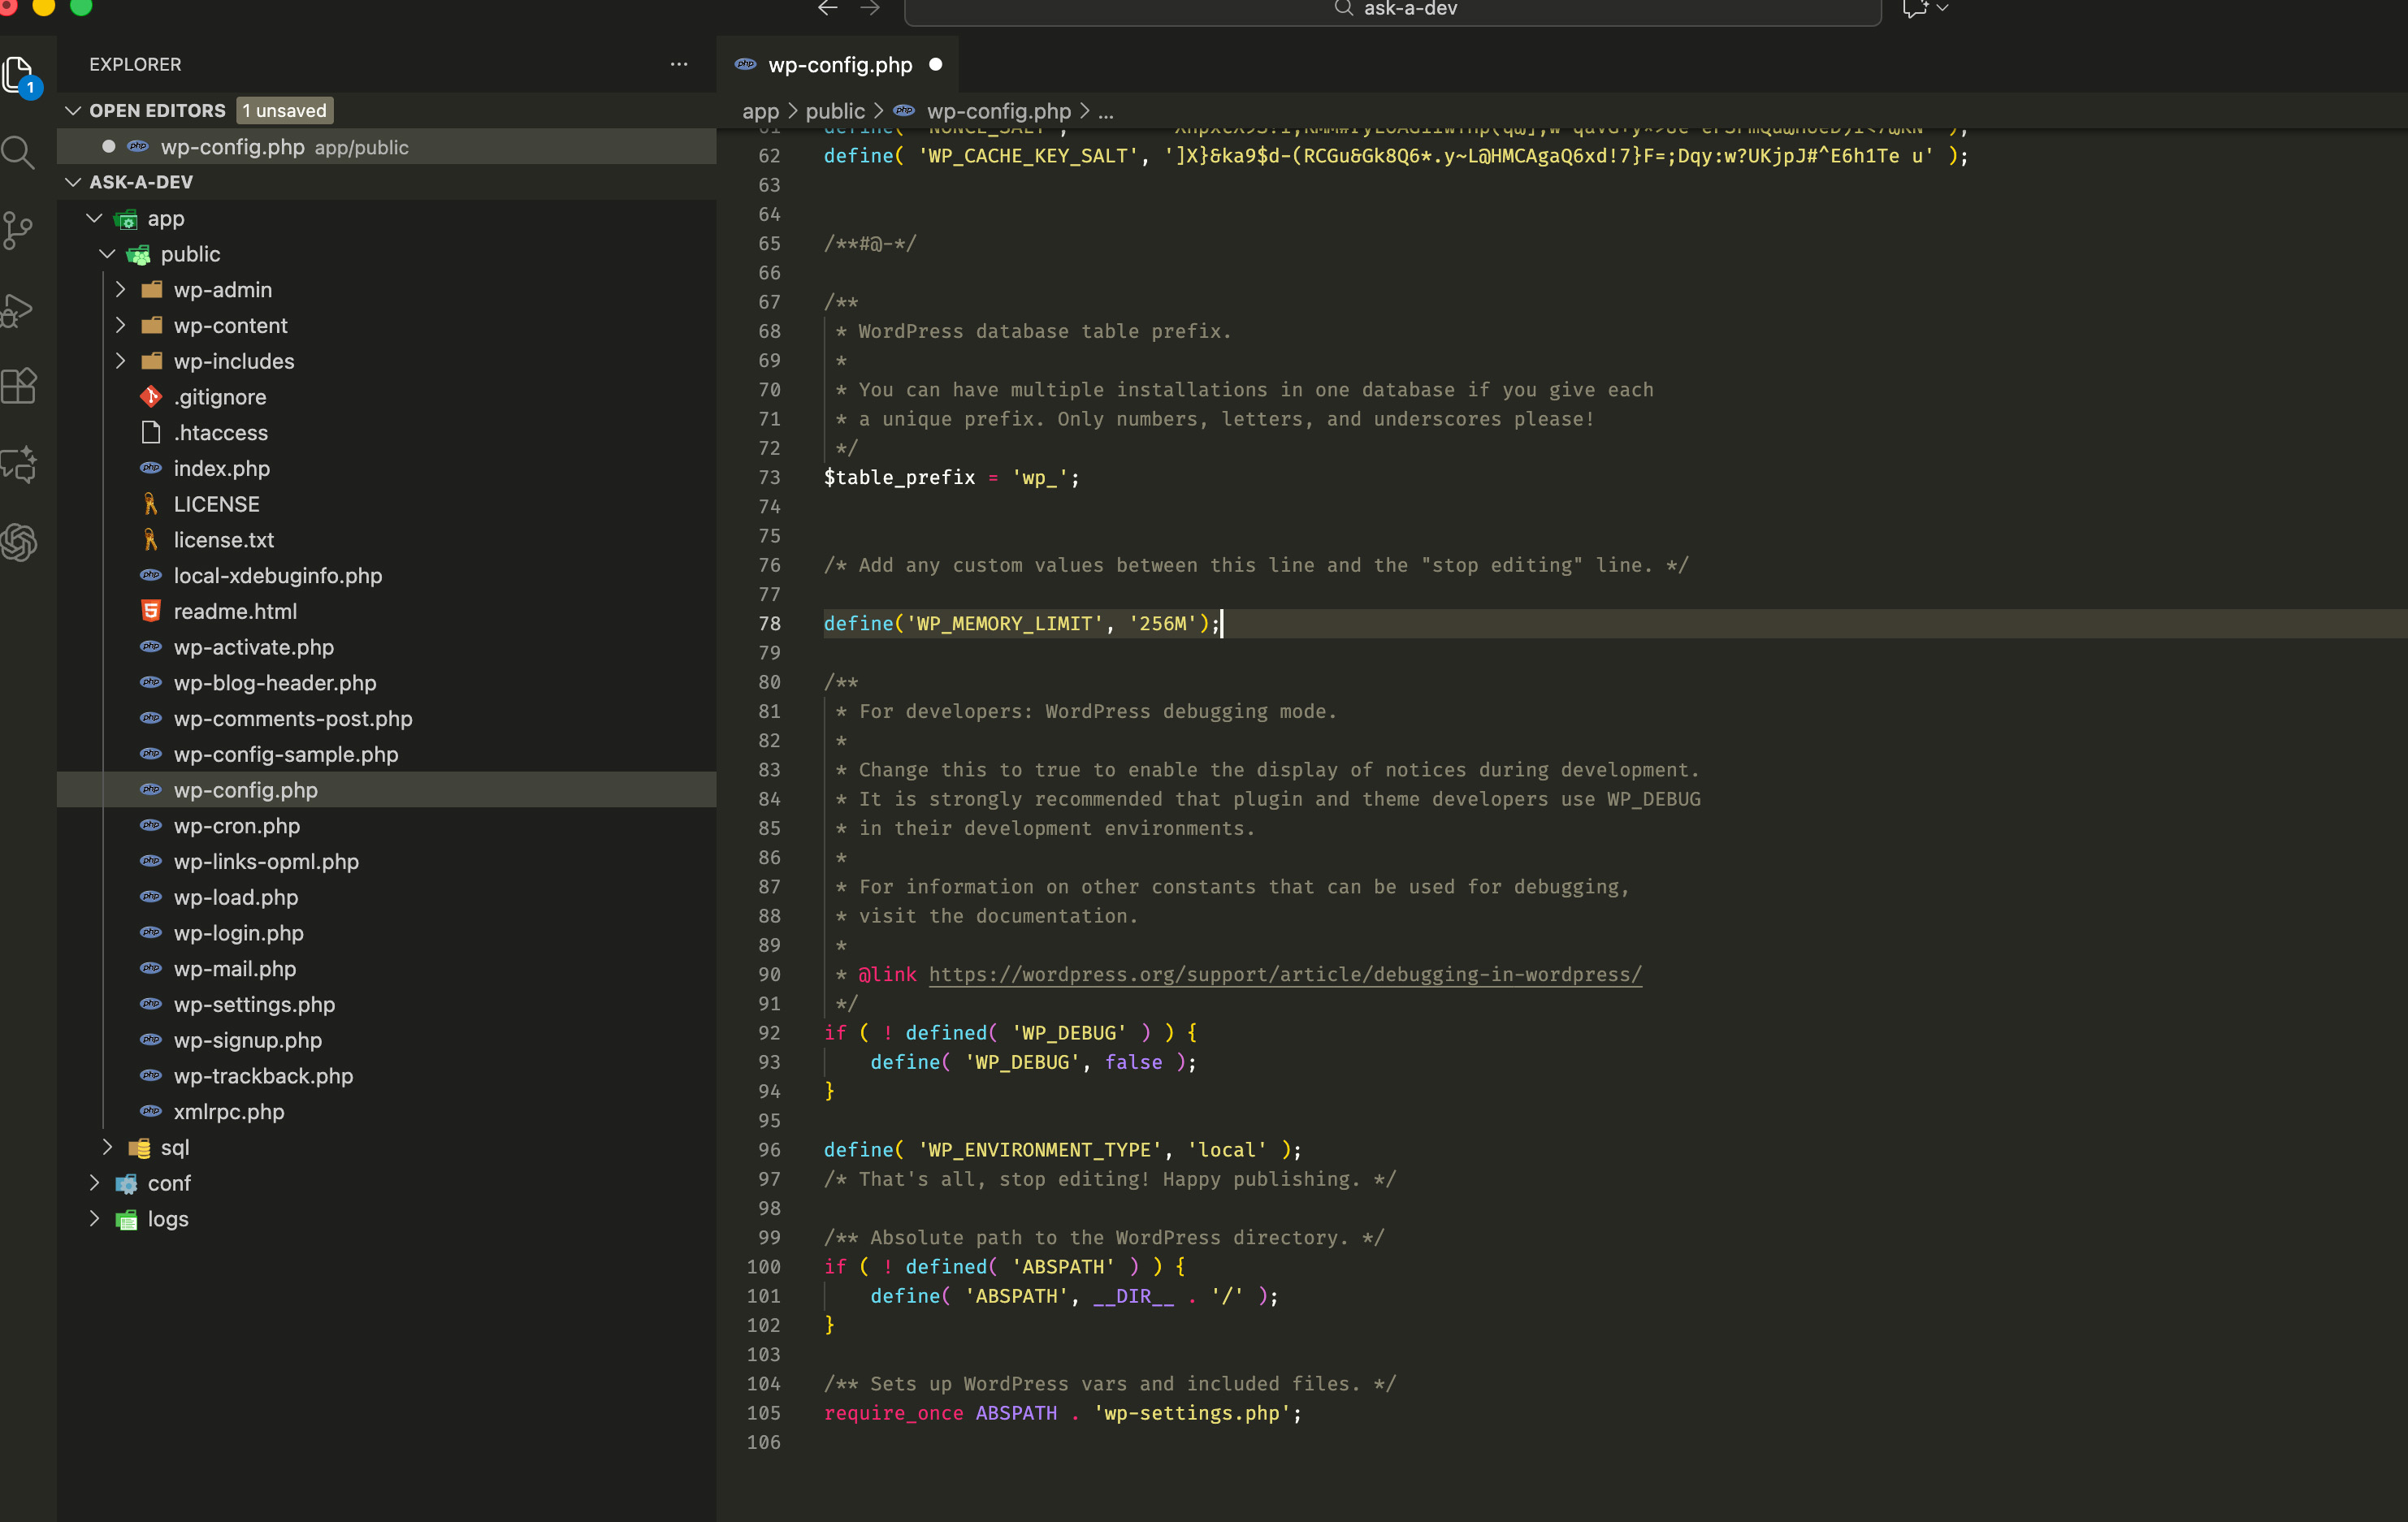
    The wp-config.php file is your gateway to increasing memory. It’s located in your WordPress root directory. Using an FTP client or your hosting provider’s file manager, navigate to this file. Always back up your site before making changes to avoid any mishaps. Once you’re in, you’ll see lines of code—don’t worry, you won’t need to change much. The key is to find the right spot to add a simple line that will elevate your site’s performance.

    Modifying the Memory Limit Code

    In the wp-config.php file, look for the line that says “That’s all, stop editing.” Right before this, add the following: define(‘WP_MEMORY_LIMIT’, ‘256M’);. This line sets your WordPress memory to 256MB. Save the file and refresh your site to see the improvement. For some, 256MB might be enough, but if you still notice slow speeds, consider increasing it further. Always ensure your hosting plan supports the higher memory limit to avoid conflicts.

    Benefits of Enhanced Performance

    By increasing your WordPress memory limit, you’re setting your site up for success with Elementor and beyond.

    Smoother Elementor Design Experience

    With a boosted memory limit, your Elementor design sessions will feel more fluid. No more waiting for changes to apply or wrestling with lag. This improvement allows you to focus on creativity and design, rather than technical hiccups. Most people think they need a new hosting plan for better performance, but sometimes a simple memory tweak does the trick.

    Improved WordPress Performance 🚀

    Beyond Elementor, your entire WordPress site benefits from a higher memory limit. Faster load times and more efficient operations mean a better experience for your visitors. The longer you wait to address memory issues, the more visitors you might lose due to slow performance. By taking action now, you’re investing in your site’s future success. For more details on optimizing performance, check out this Crocoblock article.

    In summary, increasing your WordPress memory limit is a crucial step toward optimizing your site for speed and efficiency. It’s a straightforward process that can significantly enhance your Elementor experience and overall WordPress performance.

  • E-commerce Optimization Explained: Boost Sales with Smarter UX

    E-commerce Optimization Explained: Boost Sales with Smarter UX

    E-commerce Optimization Explained: Boost Sales with Smarter UX

    You’ve spent months building your online store, but sales aren’t matching your effort. The missing link? Smart e-commerce optimization focused on user experience. When your site feels simple and intuitive, visitors stick around—and that’s exactly how you boost sales and improve online store performance. Let’s break down how a few strategic tweaks can turn browsers into buyers and grow your business. Check out some UX design strategies for more insights.

    Understanding E-commerce Optimization

    To unlock the full potential of your online store, we need to dive into e-commerce optimization. This approach focuses on making your digital platform more user-friendly, ultimately driving more sales and customer engagement.

    Importance of User Experience

    User experience is crucial for your e-commerce success. When customers enjoy their journey on your site, they’re more likely to make a purchase. Consider how easy it is to navigate your store. Can users find what they need quickly? A streamlined navigation can keep them on the path to purchase.

    A critical element is ensuring your site loads quickly and functions smoothly. A delay could mean losing potential buyers. Studies show that a one-second delay in page load time can lead to a 7% reduction in conversions. Speed matters.

    Improving Online Store Performance

    Improving your store’s performance means addressing both technical and design aspects. Clean, intuitive design is key. It should guide users seamlessly through your offerings, making it easy to find and buy products. This simplicity is what keeps them coming back.

    Consider mobile optimization too. With more shoppers using their phones, your website should offer a flawless experience on all devices. A responsive design can make your site look and work perfectly, regardless of the screen size. This adaptability can significantly boost sales.

    Strategies to Boost Sales

    Enhancing your e-commerce platform is just the start. Let’s explore some effective strategies that can elevate your store’s sales figures and customer satisfaction.

    Enhancing Platform Performance

    Platform performance is vital in keeping your customers engaged. First, evaluate your site’s speed with tools like Google’s PageSpeed Insights. Faster sites often lead to higher conversion rates. Aim to keep load time under two seconds.

    Focus on security to build trust. Implementing SSL certificates and secure payment gateways reassures customers their data is safe. Trust is invaluable in e-commerce.

    Don’t forget regular updates. Keeping your software and plugins up to date ensures your site runs smoothly and remains secure. This ongoing maintenance is a small step that can have a big impact on sales.

    Effective Digital Marketing Solutions

    Marketing is key to driving traffic and boosting sales. Start with SEO. Optimize your site with relevant keywords. This increases your visibility in search results, attracting more visitors.

    Consider email marketing. Personalized emails can re-engage customers, promoting new products or special offers. It’s a direct way to drive sales and keep your audience informed.

    Social media is a powerful tool. Use platforms like Instagram and Facebook to showcase your products and connect with your audience. Engaging content and targeted ads can significantly expand your reach.

    Success Stories and Next Steps

    Seeing real-world examples of successful e-commerce optimization can inspire your efforts. Let’s look at a case study and consider how partnering with a digital expert can help you achieve similar success.

    Case Study: Conversion Rate Increase

    A small fashion retailer struggled with high bounce rates. By streamlining their site navigation and optimizing load speed, they saw a dramatic improvement. Their conversion rate jumped by 25% in just three months.

    Key insights:

    • User-friendly design: Simplified navigation increased time spent on site.

    • Improved loading speed: Reduced bounce rate and kept users engaged.

    • Mobile optimization: Enhanced user experience across devices.

    Partnering with Eclipse Digital 🌟

    For businesses looking to achieve similar results, partnering with an expert like Eclipse Digital could be the key. With personalized solutions and a focus on results, they can transform your online presence.

    Eclipse Digital offers comprehensive services, from SEO to custom web design. By understanding your unique needs, they craft strategies that deliver growth and success. Elevate your e-commerce store with a partner who knows the digital landscape inside out.

    In conclusion, optimizing your e-commerce platform is essential for boosting sales and enhancing user experience. By implementing these strategies, you can increase your store’s performance and enjoy greater success. Don’t wait to make these changes; the longer you delay, the more sales you might be missing out on.

  • Should Your Agency Outsource Web Development?

    Should Your Agency Outsource Web Development?

    Outsourcing Web Development: Unlocking Efficiency and Expertise for Your Business

    Outsourcing web development refers to hiring external contractors or agencies to design, develop, and maintain your website or web application. Many agencies consider outsourcing web development as a way to save costs, access specialized skills and knowledge, and improve efficiency. However, it’s crucial to choose the right outsourcing partner to ensure high-quality work, timely delivery, and effective communication.

    Benefits of outsourcing web development for agencies

    Cost-effectiveness

    Outsourcing web development can be more cost-effective than hiring an in-house team, as you don’t have to pay for employee benefits, training, and equipment. Also, outsourcing partners often have lower labor costs due to the location, which can translate into significant savings for your agency.

    Access to expertise

    Outsourcing web development allows you to tap into a pool of skilled professionals who specialize in different areas of web development, such as design, programming, and optimization. This expertise can help you create a more polished, user-friendly, and high-performing website that meets your business goals.

    Scalability

    Outsourcing web development can help you scale up or down your project as needed, without the risk of overstaffing or understaffing. You can adjust the team size and scope of work based on your budget and timeline, ensuring maximum flexibility and efficiency.

    Time-saving

    Outsourcing web development can save you time by allowing you to focus on your core business activities, such as sales, marketing, and customer service. You don’t have to worry about managing the development process, hiring, training, or supervision, as the outsourcing partner takes care of these tasks.

    Advantages of in-house web development for agencies

    Full control over the development process

    In-house web development gives you complete control over the development process, from planning and design to testing and deployment. You can ensure that your website reflects your brand identity and meets your specific requirements without relying on external parties.

    Better communication and collaboration

    With in-house web development, communication and collaboration are typically easier and more streamlined. You can directly interact with your development team, fostering a deeper understanding of your business goals and ensuring effective communication throughout the project.

    Greater flexibility and customization

    In-house development allows for greater flexibility and customization options. You have the freedom to make changes, implement new features, and respond quickly to market trends or customer demands. This agility can give your agency a competitive edge in the rapidly evolving digital landscape.

    Increased security and confidentiality

    Handling sensitive data and information internally can enhance security and confidentiality. In-house web development reduces the risk of exposing sensitive client information to external parties, providing greater control over data protection and compliance with privacy regulations.

    How to choose the right outsourcing partner for web development

    Define your requirements and goals

    Before selecting an outsourcing partner, clearly define your web development requirements and project goals. Consider factors such as the desired functionality, design elements, technology stack, timeline, and budget. Having a clear understanding of your needs will help you evaluate potential partners more effectively.

    Evaluate potential partners based on their portfolio and experience

    Review the portfolios and case studies of outsourcing companies to assess their expertise and experience. Look for projects similar to your requirements and evaluate the quality of their work, user experience, and technical capabilities. Consider their industry reputation, client testimonials, and online reviews as well.

    Check for cultural compatibility and communication skills

    Cultural compatibility and effective communication are essential for successful outsourcing partnerships. Ensure that the outsourcing partner understands your business values, target audience, and industry dynamics. Assess their communication skills, responsiveness, and ability to understand and address your specific requirements.

    Consider the pricing model and contract terms

    Evaluate the pricing models and contract terms offered by different outsourcing partners. Compare the cost structures, payment schedules, and contractual obligations to find the best fit for your agency. Ensure transparency regarding project milestones, deliverables, and potential additional costs.

    Establish clear project management and communication processes

    Effective project management and communication are vital for outsourcing success. Set clear expectations regarding project milestones, deadlines, and deliverables. Define the preferred communication channels, frequency of updates, and the point of contact for both parties. Establishing a robust project management framework ensures smooth collaboration and minimizes misunderstandings.

    The decision to outsource web development or keep it in-house depends on your agency’s specific needs, budget, and long-term goals. Outsourcing can offer cost-effectiveness, access to specialized expertise, scalability, and time-saving benefits. On the other hand, in-house development provides greater control, better communication, customization options, and enhanced security.

    Consider your agency’s unique circumstances and evaluate the advantages and disadvantages of each approach. By following the guidelines mentioned in this article, you can make an informed decision when choosing the right web development strategy for your agency’s success.

    Remember, whether you choose to outsource or keep web development in-house, maintaining a strong partnership with the development team and prioritizing effective communication are key to achieving your desired outcomes and creating exceptional digital experiences for your agency and clients.

  • Building a Custom Page Builder with Advanced Custom Fields Flexible Content Field

    Building a Custom Page Builder with Advanced Custom Fields Flexible Content Field

    Advanced Custom Fields (ACF) is a powerful WordPress plugin that enables developers to create custom meta boxes and fields for their website. One of its standout features is the Flexible Content Field, which allows you to create versatile and dynamic layouts with ease. In this article, we will discuss how to build a custom page builder using ACF’s Flexible Content Field, leveraging the existing knowledge from the E2M Solutions article.

    Why Use ACF and the Flexible Content Field?

    ACF simplifies the process of adding custom fields to your WordPress website, allowing you to create fields for various content types like text, images, and video. The Flexible Content Field is a powerful layout builder that enables you to create a variety of content sections on your website without needing to code complex templates. This feature is especially beneficial for developers looking to create custom layouts with ease and simplicity.

    Getting Started: Installing ACF

    Before diving into building a custom page builder, you need to have Advanced Custom Fields installed and activated on your WordPress website. You can download the free version of ACF from the WordPress plugin repository or purchase the Pro version for additional features.

    Creating a Custom Page Builder with ACF

    1. Register a new custom field group

    To start building your custom page builder, create a new custom field group in ACF by navigating to Custom Fields > Add New in your WordPress dashboard. Give the field group a name, such as “Page Builder.”

    1. Add a Flexible Content Field

    Within the custom field group, click on “Add Field” and select “Flexible Content” from the field type dropdown. Name the field “Page Builder Sections” or something similar.

    1. Create layout sections

    Now, you can begin adding layout sections to your Flexible Content Field. Click on the “Add Layout” button and give your layout a name, like “Text Section.” Then, add the necessary fields for your layout. For a text section, you may want to add a WYSIWYG editor, a text field for the section title, and an image field for an optional background image.

    Repeat this process for each layout you want to include in your custom page builder, such as image galleries, video sections, or call-to-action blocks.

    1. Assign the custom field group to your desired post type

    Under the “Location” settings in your custom field group, choose the post type where you want your page builder to be available. For example, you might want it to appear on Pages, Posts, or a custom post type.

    1. Implement the custom page builder in your theme

    In your theme’s template files, add the necessary code to display the content created with your custom page builder. To do this, use the “have_rows” and “the_row” functions provided by ACF to loop through the layout sections and output their content.

    Here’s an example of how you might implement the custom page builder in a template file:

    <?php if( have_rows('page_builder_sections') ): ?>
      <?php while ( have_rows('page_builder_sections') ) : the_row(); ?>
    
        <?php if( get_row_layout() == 'text_section' ): ?>
          <div class="text-section">
            <?php if( get_sub_field('section_title') ): ?>
              <h2><?php the_sub_field('section_title'); ?></h2>
            <?php endif; ?>
            <?php the_sub_field('content'); ?>
          </div>
        <?php endif; ?>
    
        <!-- Add other layout sections here -->
    
      <?php endwhile; ?>
    <?php endif; ?>
    

    By leveraging Advanced Custom Fields and the Flexible Content Field, you can create a custom page builder that is both easy to use and highly

  • 3 Big Web Design Trends for 2022

    3 Big Web Design Trends for 2022

    2022 promises to be a stand-out year for web design. Current events will certainly come into play, and we all know that the pandemic has greatly affected the way users interact with websites. Mobile devices have also continued to become more powerful, and the privacy and safety of users’ information have come to the forefront of many people’s, and web designers’, minds. Check out these trends that are sure to affect website development in Minneapolis and beyond.

    Web Designer’s 3 Big Trends for 2022 Website Development in Minneapolis

    1. Sharing Instead of Telling

    Inspiring people with the message of your company or product means drawing them in with interactive experiences and visuals that will surprise and engage them. This year, you’re sure to see more background videos and animations that will engage the user’s mind while adding gentle motion to your page.

    Making these videos and animations subtle is the key to their effectiveness, as you want your pages to have life and energy without overwhelming your visitor. These micro-interactions can be triggered by hovering the cursor over a particular location, or when the user scrolls to a particular part of the page. This will help to gain the attention of your visitor while serving to share your message in a simple, digestible way.

    2. Simplicity

    If your business is looking to grow, it’s time to simplify your website. Using calming colors, vivid imagery, fewer words, and clear calls to action will help create lighter experiences that will encourage the user to delve deeper into your site. Rather than putting every bit of information upfront on one page, there will be simplified messaging that causes the user to want to know more. Complex conversations and busy imagery leave many visitors feeling overloaded with information.

    3. Safety-Focused

    Everyone is re-learning how to engage with the world after the last couple of years and people are undeniably overwhelmed. Design trends are evolving and are really focusing on helping people feel safe while preparing to reengage. Coaxing people back into the world includes giving them space, helping to reduce anxiety, and making them feel comfortable and protected.

    Focusing on safety includes not just the intricate details of the information they share with you, but on their emotional safety as well. Using natural, organic shapes and imagery inspired by the outdoors and their home decor will subtly give them a feeling of home while also encouraging them to venture into new spaces. This really is about aesthetics and feelings, as people want to be away from home, but also to be reminded of its comforts.

    With increased technical capabilities, websites have developed a lot of complexity over the last few years. Designers and developers must respond to cultural experiences and concerns in order to keep up with the competition. Contact Eclipse Digital today for a strategic analysis of your project. Whether you are building a website from scratch or just want to keep your current one updated, we are your one-stop shop for design and development.

  • How to Choose the Right Digital Marketing Agency for Your Business

    How to Choose the Right Digital Marketing Agency for Your Business

    In modern times, making a splash in the digital world is more important than ever. In the coming years, you’re likely to draw in a huge amount of your business through digital channels. Clients are using social media, websites, and other digital avenues to get information on products and services. That’s why it’s so important to choose the perfect digital marketing agency to meet the needs of you and your company in the Minneapolis area and beyond.

    How to Choose the Right Digital Marketing Agency for Your Business Based in Minneapolis

    Look for Experience

    Digital marketing is important. In fact, a successful campaign could be the difference between success and failure for your business. So, it’s important to choose a marketing agency with plenty of experience,

    Our staff includes professionals with years of experience in the world of advertising, digitally and otherwise. We promise to make the best use of all the expertise we’ve gained over the years to ensure your campaign runs smoothly.

    Great Communicators

    As much as quality marketing nous is vital to an excellent marketing campaign, soft skills are important too! After all, you need to communicate well with the company you hire, ensuring you’re able to get across everything you’re looking for in the campaign as well as communicating during the process.

    We’re committed to offering an excellent customer experience for everyone we work with, and that’s a philosophy with its roots in great communication. Only by being open can we hope to address your needs and ensure your campaign runs smoothly.

    A Range of Services

    Marketing isn’t always straightforward. There’s a lot to consider when planning a campaign, and sometimes things can change quickly. That’s why it’s important to work with a company that offers a range of different services to ensure versatility and adaptability in the event you need to suddenly change course.

    We offer a variety of different services, including web design, competition monitoring, and digital marketing. We’re adept at turning our hands to new tasks and overcoming all the different challenges we might face, so when you work with us, you know you’ve got a dynamic and changeable company on your side.

    Strong Portfolio

    Promises of great work are great, but at the end of the day, your bottom line is at stake here. You don’t want to just hear good things, you want to see concrete evidence of great work the agency has conducted in the past, ideally with high-profile candidates. The best way to see the kind of work your marketing company is capable of is by browsing their portfolio.

    Some newer companies don’t have much work to share with potential customers, making it difficult to know whether they’ll be a good fit for their team. Here at Eclipse Digital, we’re proud of our extensive portfolio. We’ve worked with a wide range of different businesses in all kinds of fields and you can see for yourself the quality of work we can produce.

    Want to get more information on the way digital marketing can help you and your business? Contact Eclipse Digital today for all your digital marketing needs!